Using buses (multi-bit wires)
A bus is a single wire that carries several bits at once, so one connection moves a whole binary number instead of one bit. You create a bus by setting a component's bit width above 1; buses render as a dotted line to tell them apart from plain 1-bit wires. To reach an individual bit, break the bus apart with a Splitter; to combine bits back into a bus, gather them the opposite way. A bus and a 1-bit wire cannot be joined directly — their widths must match.
Step 1 — Set the bit width above 1
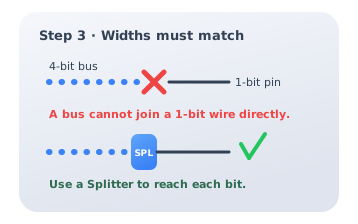
Select a component and raise its bit width in the Properties panel — for example, set an Input to 4 bits. Its terminal now carries four bits together, and any wire leaving it is drawn dotted to signal that it is a bus rather than a single line.
Step 2 — Split the bus into bits
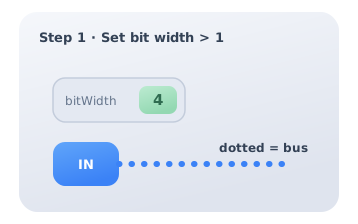
Drop a Splitter and wire the bus into it. The Splitter fans the bus out into its individual 1-bit lines — b0, b1, b2, b3 — so each bit can drive its own gate. To do the reverse and pack several 1-bit signals back into one bus, use a Splitter the other way around as a merger.
Step 3 — Widths must match
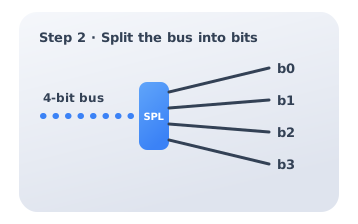
You cannot wire a 4-bit bus straight into a 1-bit port: the widths disagree and the editor refuses the connection. The fix is to insert a Splitter and take the specific bit you need, or match the two components to the same bit width. Keeping widths consistent along a path is what makes buses safe to route across a design.